If you understand the reference to the title of this post, you're respect for me will either lower drastically, or raise significantly. If the former, then perhaps you should just take this design as something that looks cool, and forget that it has a theme =P I've been very excited to write this blog up since I painted this design. Introducing the theme of my favourite pony: Rainbow Dash!

So, Rainbow Dash is a character from the show My Little Pony: Friendship Is Magic. Yes, it is a kid's show, but the new season was specially written so adults can watch it with their children without feeling embarrassed. This plan worked so well, that with young girls being the first, the second largest audience for this show is young adult males. It has become the most popular meme on the internet by three times in the last year. I definitely recommend watching it. At first, my younger brother thought I was insane, and being a teenager, he wanted to be "cool" and not like the show, but after showing him a couple of episodes, he's changed his mind and loves it. The toy you see in this picture was given to me as a Christmas present, along with another character, Apple Jack.

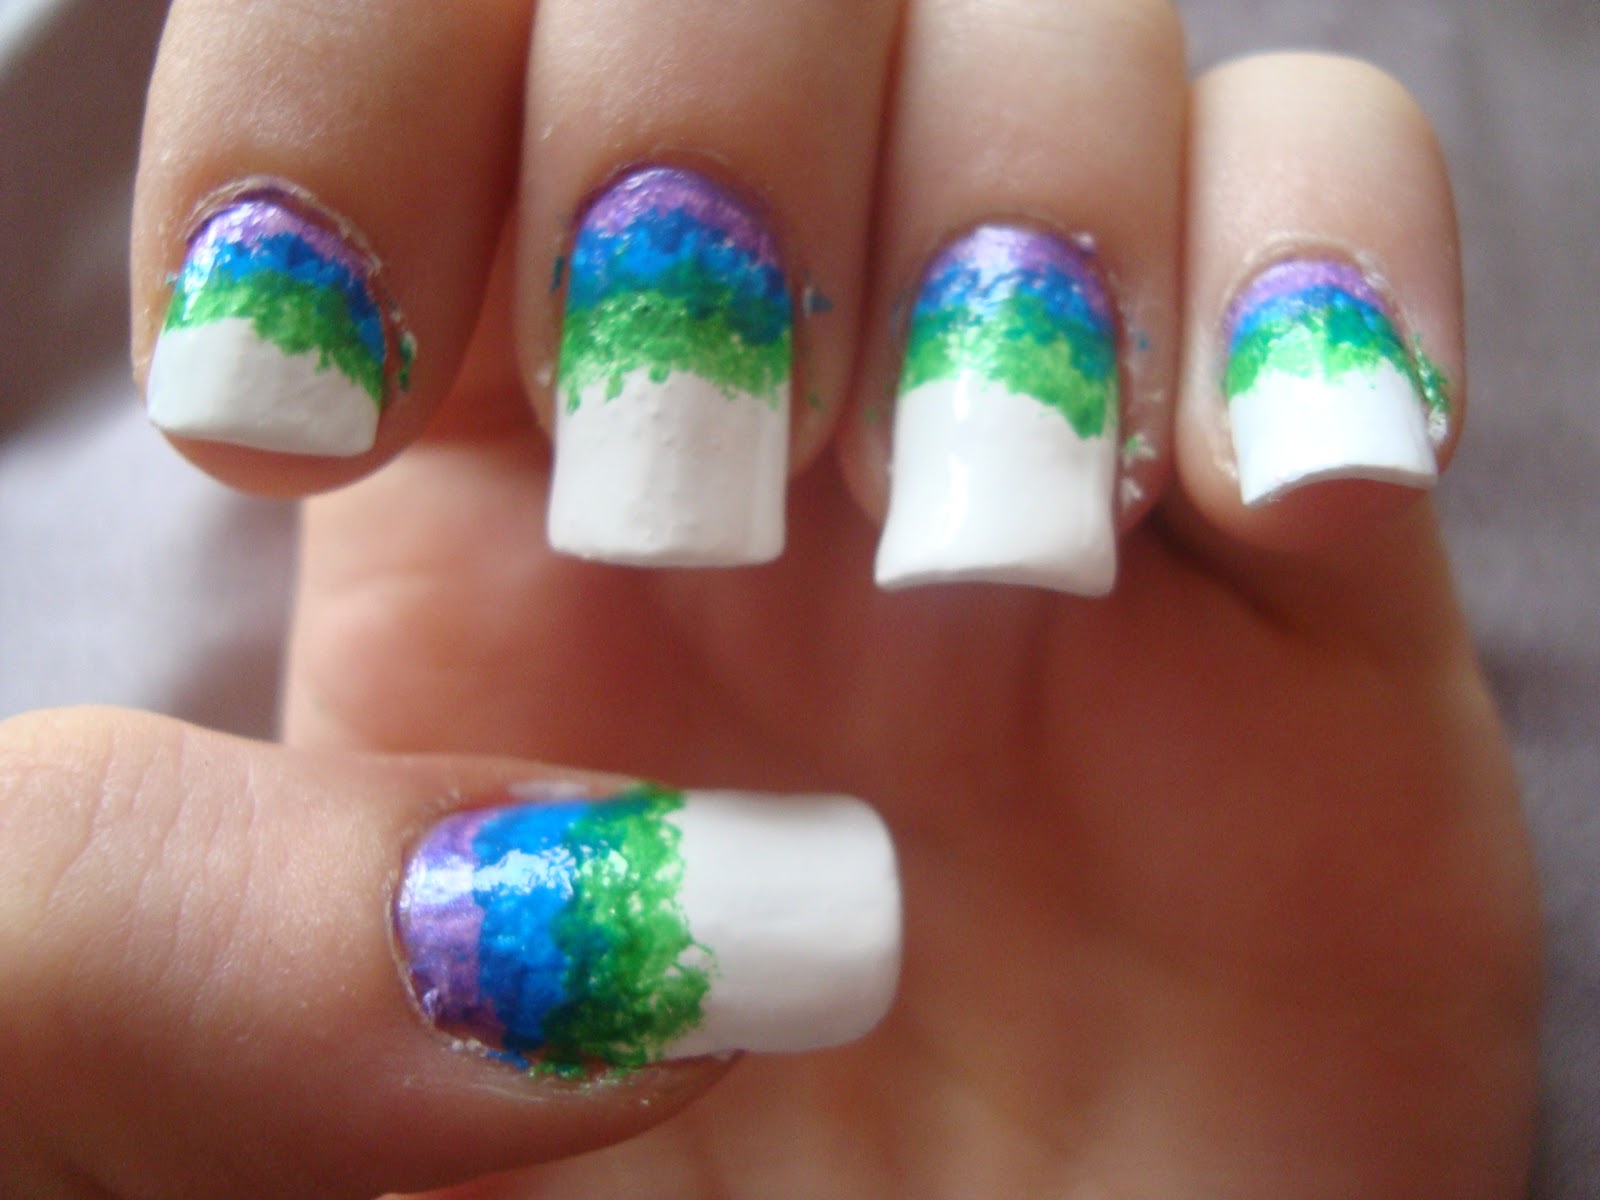
The toy in the picture isn't the best example of Rainbow Dash (Silly Hasbro and their toys. They got her cutie-mark spot on, though), but it's the colours that count. Rainbow Dash is a sky-blue pegasus pony with a rainbow mane and tail. I don't have a sky-blue crackle polish, only turquoise and navy for the blues, so I chose turquoise. Here is a better picture of her:
So for this design, I can walk you through with pictures. You might recognize this design from a while ago called "Hidden Neon", where I used neon rainbow colours and a black crackle. For this design, I didn't use exclusively neon, I only added one purple shade instead of two, and used a blue crackle. So here we go.
Start out by painting your nails with a couple of coats of white polish. I used Sally Hansen's "Nearly Nude". Once that's dry, you can use the gradient sponging technique like I did in "Hidden Neon", or this time, I just dabbed the polish on with the brush. Once the crackle is on, it's hard to tell the difference between sponging and dabbing. I started with MigiNailArt "Purple" at the base of my nails, then moving to the tip, I usedNail Jazz "Blue", Princess Collection "Electric Green", MigiNailArt "Lemon Yellow", Nubar "Neon Pumpkin", and finally Nicole by OPI's "Keep It Real". Once those colours dried, I covered my nails with OPI's "Turquoise Shatter". don't forget a base and top coat, and wrap the red polish around your free age to keep with from chipping. When I say this doesn't have to be neat, I mean it! In fact, if you make it slightly messy like I did, it looks more like a gradient.


I hope you like this design, whether you're a "Brony" or not. If you're not using this design to make an accurate pony representation, then feel free to change the order of the colours and the crackle colour. Remember, it's all for fun. You may also notice that I shortened my thumbnails (in fact, all of my nails). Thanks for readin!


This is by far my favorite rainbow dash nail design I've seen!
ReplyDeleteKeep up the good work!
Thank you very much! I moved my blog to my own website. You should check it out! :-) scribblingwithpolish.com
Delete