Tuesday, May 31, 2011

Zebra party

I don't know if this is good news or bad news, so it's just news: I filed my nails. I always file them between my designs, but this time I cut back on a lot of the length. I miss my old nails, but they will grow back, and these have a nicer shape to them, although my index nails still grow weird. To those who love my longer nails, I'm sorry, but it had to be done before they broke. To those who thought my long nails were freaky and needed to be shorter, you have your wish. They are still pretty long still, but nothing like they used to be.

The batteries on my other camera died and I don't know where the charger is, so it's back to using my webcam for a while. I do think they look very nice short, but the longer nails were more fun to play with. However, nothing can stop me from painting these nails!


I always take photographs of my nail art designs, no matter how bad the quality of the picture. This was I can remember all of my creations, or look back to see if I can redo them. In this case, I am doing just that. Like the corset design, I am doing another comparison design by a couple of pictures I found of my shorter nails. Although you can still create many nail art designs on shorter nails, you can do a lot more when your nails are longer. For example, I took this design and manipulated it slightly. Before I actually have a free edge to my nails, I turned this design into a french look, white keeping my ring fingers a whole nail design. 
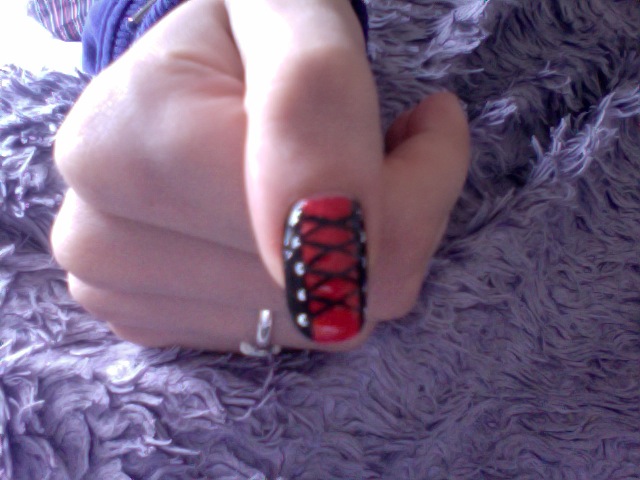
I had almost forgotten how short my nails used to be! No wonder I hid them from everyone. My cuticles look sore as well. I am so glad I changed my ways, and I really hope I'm an inspiration to a lot of other nail biters. I'm trying to help my brother quit, but even I couldn't quit at 15, and he can't get away with covering his nails with polish. Clear polish can only go so far; you can still see the imperfections you want to bite. My best friend doesn't bite his nails as drastically as I did, and to be honest, his nails look pretty good, but he refuses to stop biting his. Not that I encourage biting, but his nails do look good and his biting isn't causing his fingers any harm, so I won't push the subject.

To create this design, I painted all of my tips and the nails on my ring fingers white using Migi Nail Art's White and OPI's "Lavender Cloud". I had to change because my Migi white pen exploded. It's new as well. I then took ArtDeco's black and created black lines horizontally across the white of my design to create a zebra look, then I lined the base of the free edge in black as well. Don't forget to use a base and top coat for your designs to keep your nails safe and your design from chipping or pealing. I think, judging by these pictures, my artistic abilities with a nail art brush has improved slightly. If I do say so myself.

Monday, May 23, 2011

Black with white stripes or white with black stripes?

This is a simple design unless you're trying to paint your dominant hand. I want to find a piece of mesh and paint over it, onto my nail, but I wanted to try out these new polishes with striper brushes before experimenting with things I don't have. I like this design, and it's great for interesting-looking tips and for those who prefer black and white designs.
In order to make this design happen, once you've finished your base coat, paint your tips white, but rather than give a smile-line, make it straight. If you're going to follow my idea, paint your ring finger with a black tip. You can also paint your thumb with a black tip too, or invert the entire design. Once you have your tips done, take a black and, using a striper brush, paint diagonal stripes in both direction, making them extend a little past your tips. Finish with a base coat and you're done. The white I used was MigiNailArt's White and "Glitter Gold".
You can also try this design with other colours, or you can change the tip shape from straight to ordinary smile line to chevron.

Monday, May 16, 2011

For good girls, shoelace. For naughty girls, corset!

I'm a bad girl so in my mind, this design is a corset, but when little kids ask, I claim it's a shoelace. I'm wanting to re-do this design on my long nails, but I'm hoping to have a more sophisticated look for Wednesday because my grandmother is visiting and it would be nice to have decent nails for her (that sounds crazy, but you all know I have a nail obsession). For all those people who saw the pictures before reading this, I didn't cut my nails. I created this design long before I let my nails grow (in fact, these pictures are about a year old), but the design looks a lot better on longer nails. However, as proven by my pictures, short nails can hold this design too.
To create this design, paint a couple of coats of base colour (I chose bright red) over a base coat and leave to dry. Then paint the edges black. Next find a white nail pen or dotting tool and place an equal amount of white dots down the centre of the black. The number of white dots varies depending on how long your nail is. Finally, take a striping brush and create black lines that zig-zag down your nail, alternating with the opposing side giving it a lace effect. An alternative is getting a toothpick and dragging the WET black polish from side to side before adding the white dots, but I think doing it the first way looks more realistic. Wait for your design to dry before sealing it with a top coat.

This is one of my favourite designs, and you can experiments with different colours too. Here is what the design looks like on longer nails. More pictures to come once I can get them off my camera.

Monday, May 9, 2011

Hidden Neon

Every year in the town I live in we have the Trade Fair. People set up booths in the local arena to promote their businesses and products by giving people samples, discounts, info, leaflets, and to let them see their products first hand. I seriously considered setting up a booth for my nail business, but it cost too much. Anyway, one booth was selling Migi Nail Art pens. I have quite a few of these, but they have just come out with a glitter/metallic set, and a neon set, so with a pretty good deal, I bought them. I'll show you the glitter/metallic one some time, but this is what the neon set look like:
This picture does not do the colours justice. They are seriously like highlighters! I still wanted to use my crackle polish, and was sad to see the Girly Goth design go, but it had chipped since I caught my fingernail in the car door (thank goodness I didn't damage my actual nail!) so I came up with a rainbow design than I could place under the black crackle. It reminds me of those black scratch boards I used to have as a kid, where you could scratch the black away to reveal rainbow colours of sparkles underneath.
Without the crackle, it looks pretty Eastery (there is that word again). Jeeze, these pictures don't show neon well, do they? Anyway, I applied two coats of Sally Hansen's Lavender Cloud as a white base after my base coat. I tried without the white but the colours looked dull. Once the white had dried (and I mean seriously dry, or the next part won't work), I took a clean foundation sponge and made a gradient effect with the rainbow colours (red, orange yellow, etc) starting with the "Deep Purple" at the base and "Fire Red" at the tip, but if you want, you can reverse this order. If you want to know how to do the gradient, see my very first blog post. Once I had all the colours on my nail, I let them dry (didn't take too long), then applied a thin coat of the black crackle. I made it thin so the black spots wouldn't be so heavy and thick because I really wanted to see the neon colour show through. Finally, I sealed it with a top coat which made is smoother and added shine and really made the neon colours pop! The black crackle dries to a matte finish, so a top coat gives it shine.
Obviously I used the colours from the rainbow, but these are Migi's official names in order that I used them (so... reverse rainbow): "Deep Purple", "Magenta", "Royal Blue", "Kelly Green", "Lemon", "Neon Orange", and "Fire Red". This kit also includes "Hot Pink". This are my nails in the sunlight and in the shade:
I hope you like this design! Any questions, you know how to ask. Enjoy!

Tuesday, May 3, 2011

Girly Goth

I have wanted crackle polish for a LONG time, and I must be the last nail art lover on Earth to get my hands on it! The only place I have seen it for sale was at the hairdressers in town, but they had sold out, so when my brother went to get his hair done, my family saw it for sale and knew I wanted it, so when they came back home, I got the awesome surprise that is OPI's Black Crackle nail polish! However, there was a condition to this free gift: I had to clean my room in order to use it. Well, my room is clean, tidy, and organized so I have the blissful joy this morning of christening my new polish. But I've seen everyone apply a base colour with the polish on top, and it still looks amazing, but why conform to everyone else's simple idea? So I came up with my own use for it (meaning, I didn't cover my whole nail with the crackle), but still keeping it simple and easy.
This design is super super easy! I applied my usual million base coats, then two or three coats of OPI Nicole "Believe It, Do It", then waited for that to dry for longer than I usually do, just incase. I then did a side-swipe of the crackle and filled in the lower corner. Then I sat back and watched the magic happen. It looked so cool to see it crack and change as it dried! Once that was done, I took ArtDeco's silver and made a stripe to separate the black and pink. Once it was all dry, I applied a top coat. I used Cutex "Fast and hard" (oo-lala) top coat for the first time. I like it for a basic top coat, it works well.
The weather isn't very nice today, so I couldn't get a good shot of my nails in a sun, but I was also handling the heavy camera myself with wet nails... I promise I used crackle, although these pictures don't do it justice. And the pink is supposed to look glossy and shimmery, but the camera doesn't pick that up either. I suppose it shows that you can use a plain black polish instead of shatter (although I prefer the shattered look), and you can use any colour as a base, it doesn't have to be pink. I suggest you use a bright colour though to contrast with the black, but not so light that the silver doesn't have a good affect, nor too dark that the shatter is pointless. I hope you have fun with this design if you decide to try it out. It is super easy!