Saturday, March 17, 2012

Luck o' the Limes!

Happy St. Patrick's day, everyone! Am I Irish? Not a bit, but I can never pass off an excuse to do my nails to an occasion. If you like green, you've come to the right place! Unfortunately, it's my least favourite colour, but I quite like these nails. Why Luck o' the Limes? I'm English. I'm a Limey!

Anyway, I think this blog will be another picture spam. I did take quite a few with and without interesting effects. First, you might notice that my nails are considerably shorter. I took a pencil and marked the half-way point on my tips and filed down to the line. Here is a comparison photo that my brother kindly took:
The nail glue makes my nails look kinda dirty, sorry. Also, you might be able to see that my right (left in this picture) thumbnail broke. The corner just came clean off, but once I filed it much shorter, it looks square again. So... to the green!
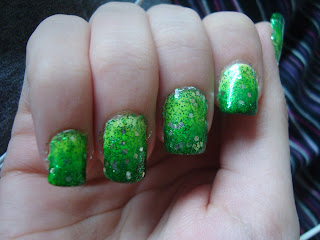
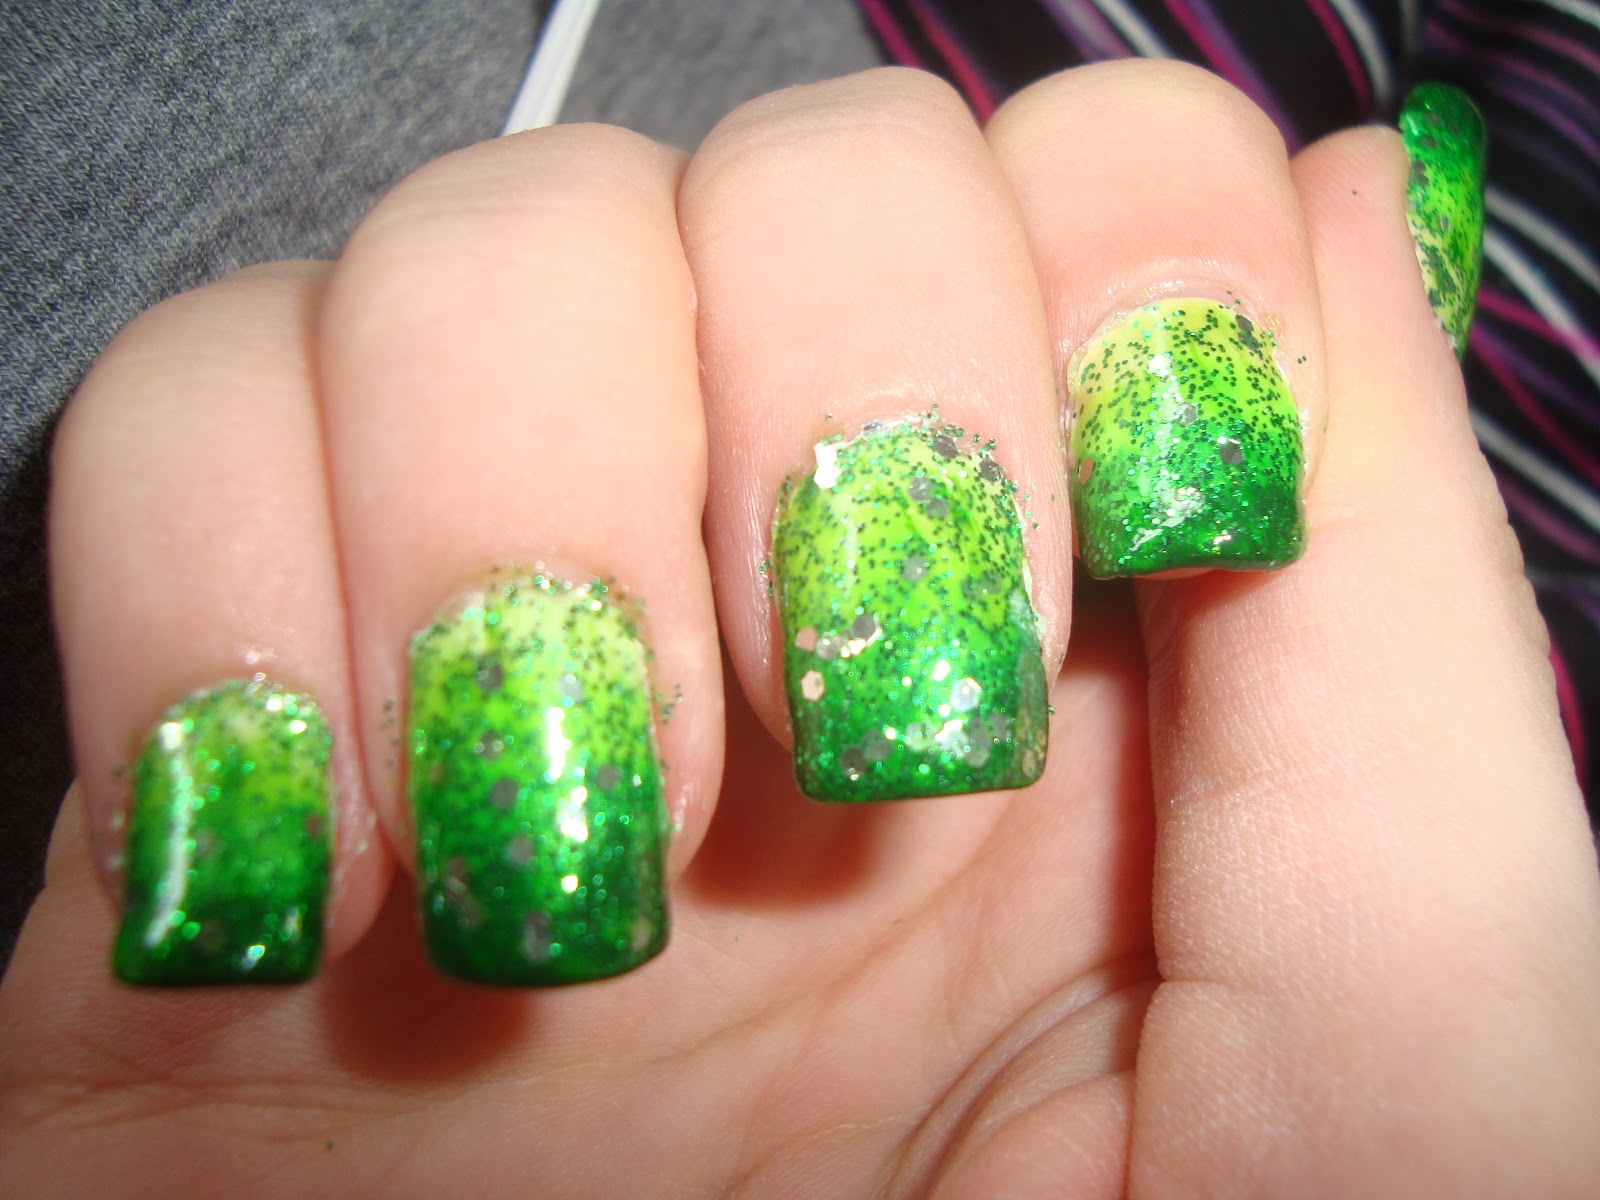
So much green! It's a nice excuse to use some of these colours. When I don't particularly like a colour, I don't really include it in my designs. But since Claire bought me the green sparkles for Christmas, I've been dying to use that polish again! So for this design, make sure you have a good base coat like usual, and paint your nails completely white. I used Quo by Orly's "French White". You'll need this white to make the colours pop out more, and although it won't do much to the darker shades, you really need a white base for the lighter ones or they won't look too great.
Dosn't have to be perfect, it just has to be white. So, onto the colours. You can do this step in a bunch of different ways from regular stripes to splattered effect to drag effect, to sponging, or you can follow along with what I did. If you notice, the gradient with this design is smoother than it normally is. Well this is how I did it.
Nice and messy! I took 4 different shades of green and starting with the lightest, I splodged them onto my nails in stripes, slightly overlapping each other. the lightest green is Sally Hansen Ceramics "Ghoulish Green" which, to be honest, is a really nasty colour! It's a short of shimmery greeny yellow. Brilliant for Halloween. The next lightest is MigiNailArt's "Kelly Green". The second darkest shade is Princess Collection "Electric Green", and the darkest is Nail Jazz "Green". Here is something I've not said before... Don't let these dry completely! Shocker! Let them get slightly tacky, so by the time you've placed all of these colours on one hand you should be fine. Once they were tacky I took OPI's "Fresh Frog Of Bel Air" and applied it thickly over my nails. This is the glittery green. It's actually a clear coat with sparkles in it, so the clear polish smudges the other polishes, turning them into a gradient. If you try with with regular clear polish, it will still work, but you'll contaminate the clear with whatever colour your'e using. It contaminates this OPI polish, too, but because it already contains a lot of green, you don't really notice it as much. Finish off with a top coat, and you're done! Time for a photo spam!

Thursday, March 15, 2012

Pink and Black tips

I really can't find a more interesting title for this design. Well today I think I'll give you excuses to comment because I'm in need of a little help. Let's start off with what else I can call this design.

What was going on in my mind other than "that's pretty" was actually something slightly unrelated. You should all know by now that I'm a fan of Harry Potter, and have been since the beginning. I'm also a hopeless romantic. My favourite character in the series is Severus Snape, and I just love his connection to Lily Evans. Don't know what I'm talking about? Go and read the books, I don't want to spoil it. Anyway, The black in this design symbolizes Snape (he couldn't be any other colour) and the pink is Lily, and then I also hand painted a flower on a couple of nails, even though I don't think it's a lily.
To be honest, I think, and this is rare, my right hand turned out better than my left. At least the blending was better. On that note, I accidentally discovered a new way to blend, which I'll show you when I post my St. Patrick's Day design on Saturday. Anyway, I really like this design and is one of my most commented on. Mostly because the flowers are NOT decals. You know I'm a free-hand artist and I don't like to cheat (unless I'm having a really lazy day!). Although it doesn't really show up on the flash photographs, on my nails the blend between the pink and black looks very purple, and as that's my favourite colour, I was really happy about that natural detail.
So make sure you start off with a thick base coat because you're dealing with black. Once it's dry, paint your tips black as neatly as you can. OR you can blend the black which now I think of it is a nice idea and I wish I had done that. I used Sally Hansen's "Black Out". Once it's dry, paint the very tip of your nails pink (I used MigiNailArt "Hot Pink") and blend it out either using a clear polish (which will contaminate it with colour), a brush, sponge, or any other way you can think of. I can't really teach you how to create the flower design, but you can try it out yourself (I used Nail Jazz "White") with an art brush or pen, get someone else to try, or you can use a decal. I placed the flowers on both ring and thumb nails. Or leave it blank. Feel free to cover this design with a glitter coat. Don't forget a regular top coat!


Now for the help... please comment if you can! Or contact me somehow. I need to know if it's possible, and if so, how, to move this ENTIRE blog to a real website. I don't want to manually move a year's worth of posts or rewrite any of them. I googled "how to move blogspot blogs to website" and apparently there used to be a way a couple of years ago, but since then blogspot got clever and that option is no longer available. If you know how, PLEASE let me know! Thank you!

Friday, March 2, 2012

Cherry Blossom

This is actually many many weeks old, but it's about time I posted it. Valentine's day got in the way. So here is my cherry blossom.

Let's see if I can remember which products I used. Looking back at this picture is weird. I can still see the mass amounts of nail glue holding my pinkie together. I must have fixed that after this design. The blue tips I think were MigiNailArt's "Light Blue" but don't quote me on any of this. The brown vines were a combination of Rio's "Black", Nail Jazz "Brown", my unnamed brown, and Nail Jazz "Copper" or something. The blossoms are white, probably MigiNailArt, and a shimmery lavender, I think Nail Jazz. After I took these pictures, I covered the design with Sally Hansen's "Diamonds" overlay to make it glittery. Sorry I can't really remember, but you can use your own products from home to recreate this design if you want to by looking at the pictures.
I think under that band-aid is a rather large paper cut. I tend to bleed a lot when cut so I'm sorry if it gets in the way of the picture. I hope you like this design!